
Getting Started
Domains
Add an Artwork
Adding your artwork to your website
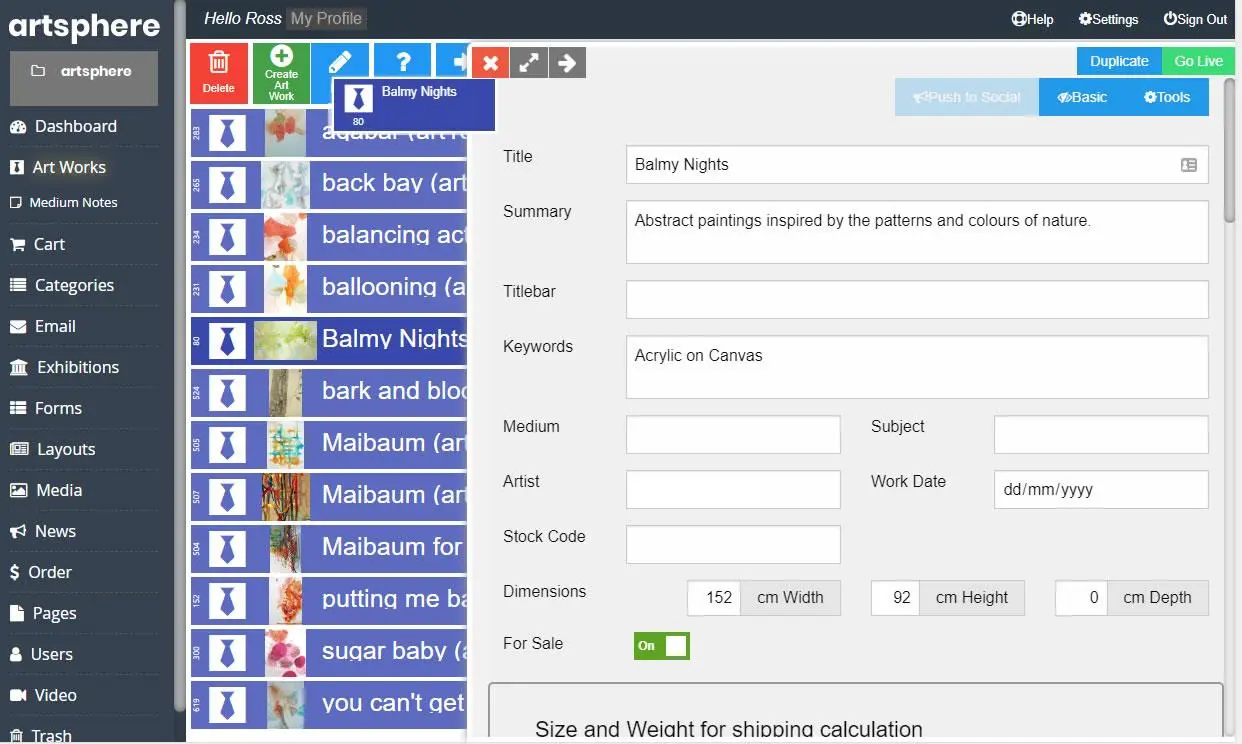
Step 1 - Art Information
We highly recommend filling out as many fields as possible including a good description of your artwork giving it as much potential as possible to be found art lovers are searching online in Google.
- Add the name of your artwork to the Title field
- Add a short description about the artwork (approx 160 characters)
- The title bar is optional, allows you to place more keywords for search engines. Example "Balmy Nights Watercolour by your name"
- The medium used - example "Acrylic on Canvas"
- The subject of your artwork - example "Portrait of John Brown"
- The artist name will automatically populate with your name, however, you could change the name for another artist if needed or if the work was created with another artist.
- The work date is when it was created
- If you have a stock code for the artwork place it here
- Set the dimensions of your artwork
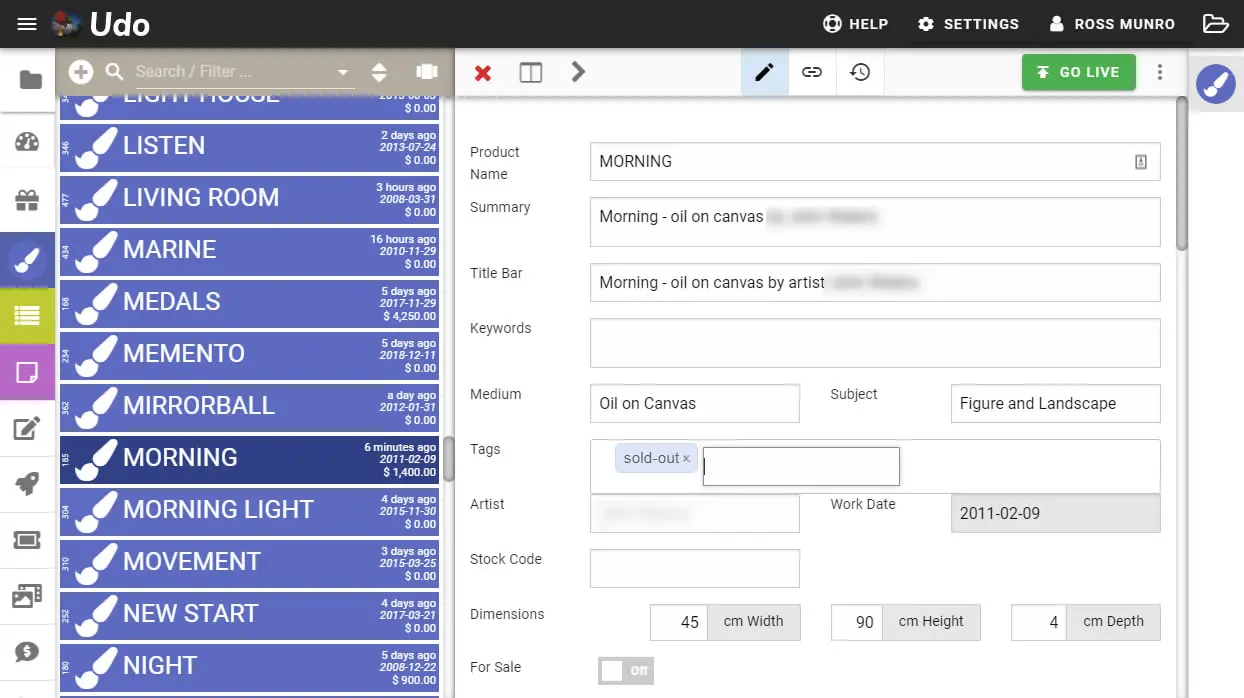
- If you wish to display your artwork as already sold, add the tag sold-out, see image below
If your artwork is not for sale then go to Step 3
Step 2 - Art For Sale
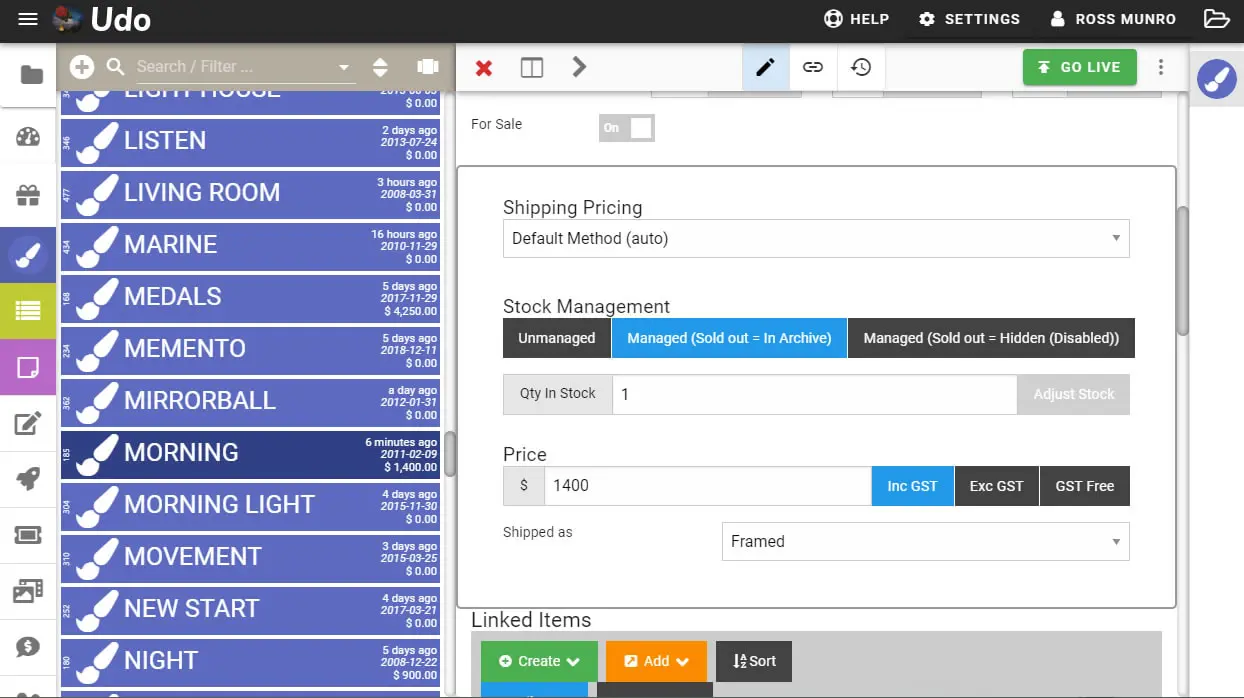
Art for Sale
- Click on the For Sale toggle to turn on
- Shipping Calculation
- If you plan to include the shipping cost into the price of your artwork then leave the Size & weight empty. (Free shipping)
- If you're planning to add a flat rate for shipping then leave empty
- If you're planning to add a shipping calculator to automatically calculate the shipping costs for individual artworks then place the shipping dimensions and weight.
- Stock Management - set to Managed (Sold out = In Archive) Qty in stock =1 and then click on Adjust Stock
- Price
- If you're not registered for GST then select "GST Free" and add Price
- If you are registered for GST then select "Inc GST" and add Price
- Shipped as - select how you will ship this artwork from the drop-down menu
Step 3 - Adding images & Categories
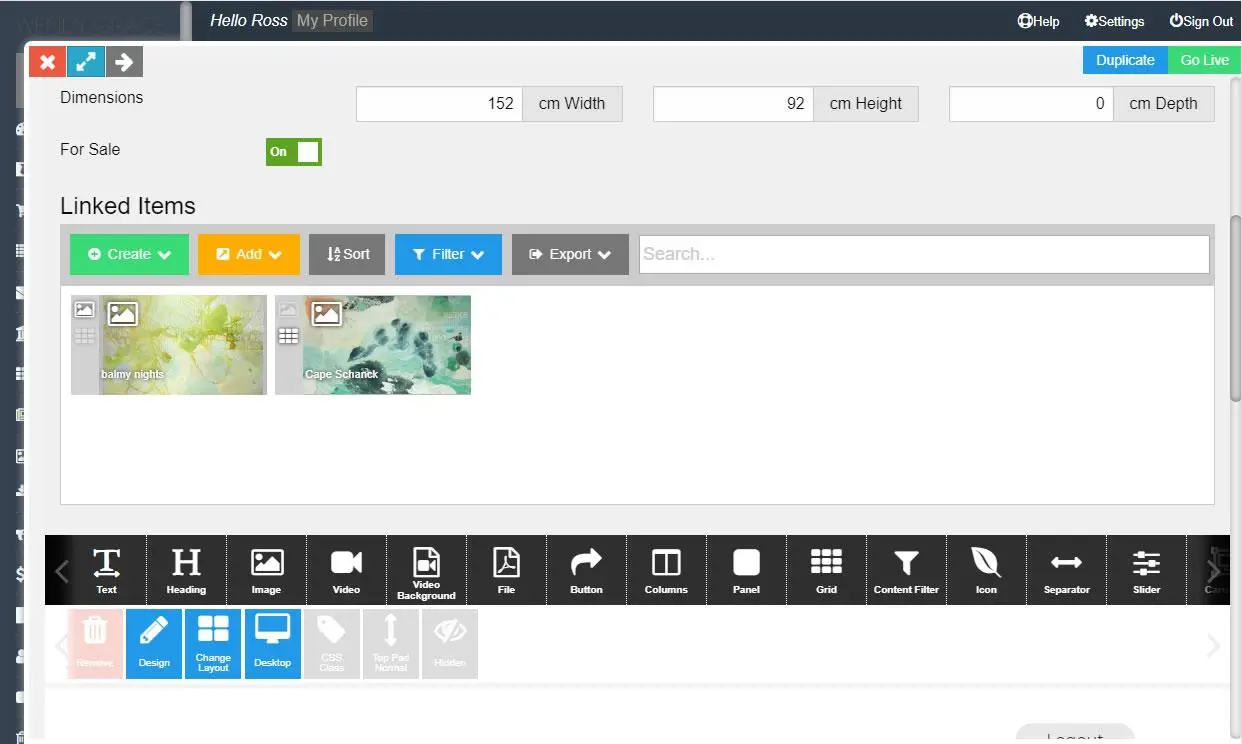
- To add the image or images of the Artwork, drag your image or images into the Linked Items area and drop. The images will automatically upload and attached to this Artwork. You can also add images by clicking on the yellow ADD button and selecting the type of image you want to upload.
- If you have multiple images 1 will need to be set as the featured image and the others as a Gallery image, See little icons on the images in the linked items area. You can toggle between the different types(Featured or Gallery) by double-clicking on the small icon to the left of each image. To remove make sure both icons are faded out.
- If you are using categories then click on the yellow ADD button and Click on the Category in dropdown list and select the category for your artwork to go into.
Step 3 - Add more information about artwork
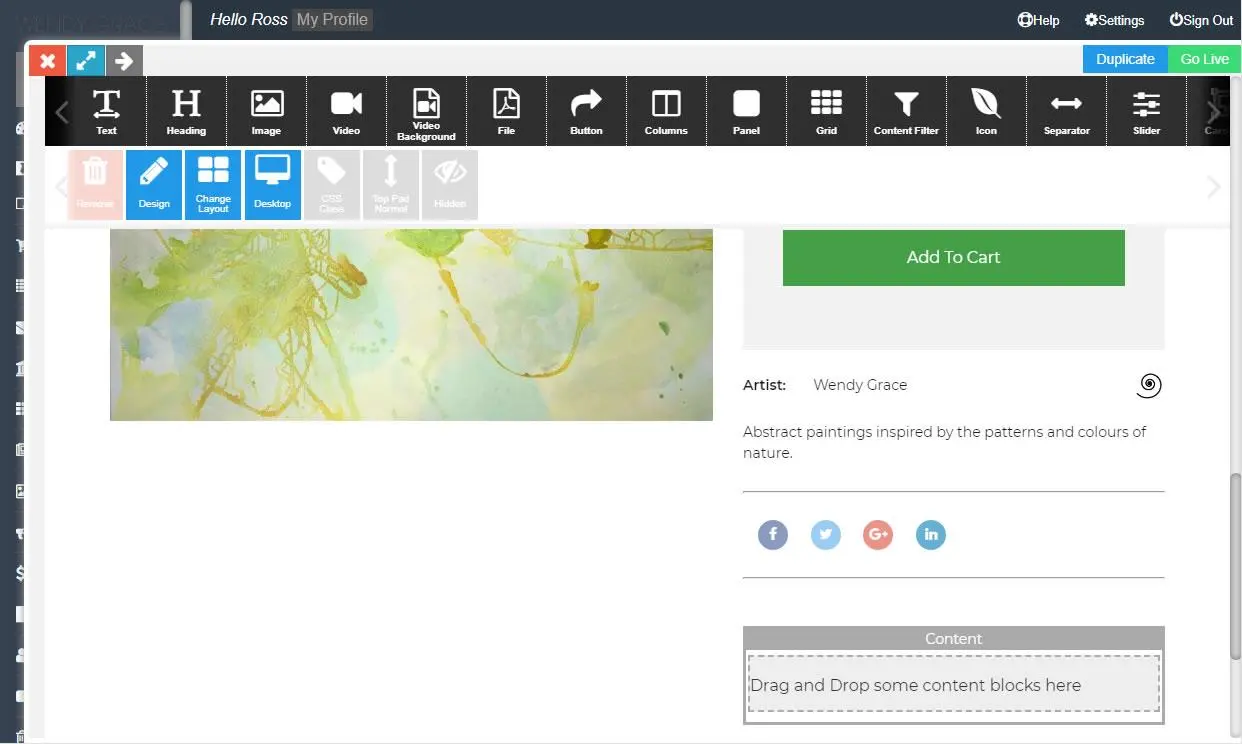
If you want to add more information about your artwork then do the following.
- Drag the Black "T text" Icon into the content area by clicking on the icon and then dragging into the dotted area in the grey content block. The grey dots will turn red when you can drop the Text block.
- Click inside the text area and start typing.
- Once you're finished then click the Green "Go Live" button top right of the page.
Don't forget to check from the front end of your website that everything is correct and presented well.
Bulk uploads
We have other options available if you have many works to upload. Please call or email us to discuss.